Welcome

Welcome to this blog which will detail the restoration of my 1961 Reliant Regal, Reg. Starting as a complete novice I hope to be able to carry out a total restoration of the car from 2011 onwards to coincide with its 50th birthday. For many a Reliant Regal may seem like a strange choice of car to restore, but for me there was only ever going to be Reg. I inherited Reg from a sadly departed friend and vowed to get it back into full working order as much as a tribute to him as anything else. Almost seven years have passed since that vow in which time I have gone through university, job hunting and house purchasing and renovation. I now finally find myself in the right position to make a start and will be sharing that journey on this blog for my own personal record and also for everyone else to enjoy. I hope you will follow along.
Showing posts with label regal. Show all posts

Wednesday, 1 February 2006

Wheels off. Leaks Located.

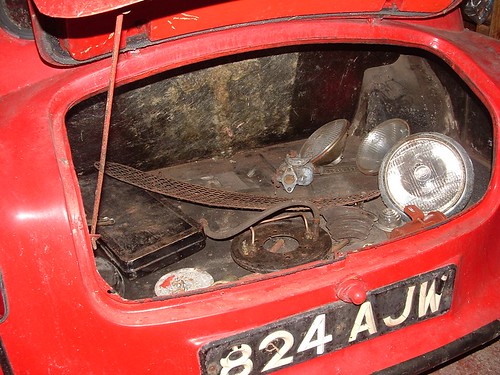
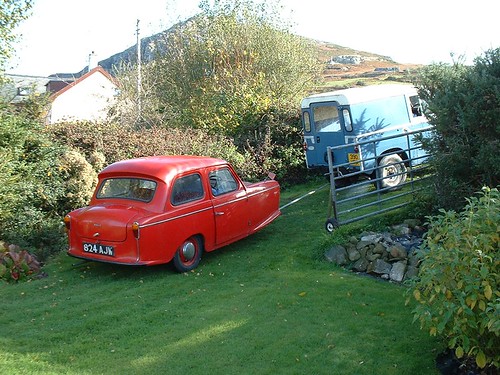
During February I managed a weekend away to try and discover where the brake system on Reg was leaking fluids from. After working on the master cylinder I was fairly sure that there were no leaks coming from there, so that left the rest of the system to investigate. First job on the cards was to get Reg jacked up to allow easier access to the pipe work underneath and to enable us to remove the wheels to get a look at the brake cylinder inside each wheel. This was not such a major job as in the past. I think we are finally getting the hang of it.

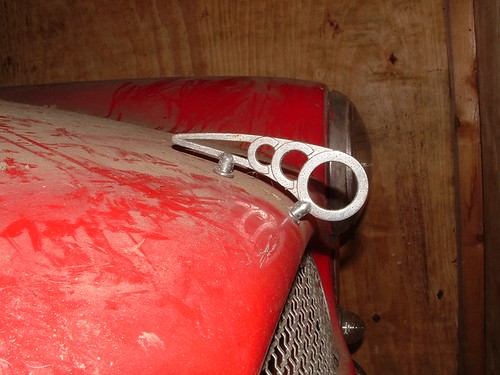
Once up and securely on concrete blocks (we aren't planning on putting him back down for a while), we attempted to get the wheels off. Unfortunately the nuts were stuck solid. Not that surprising really considering the length of time since they were probably last turned. Luckily we had some releasing oil handy so applied this and the rear two wheel were quickly off. The front wheel proved a bit tricky due to its location in the center of the car. To remove it we had to use a length of iron pipe on the wrench in order to get enough leverage to turn the nuts.

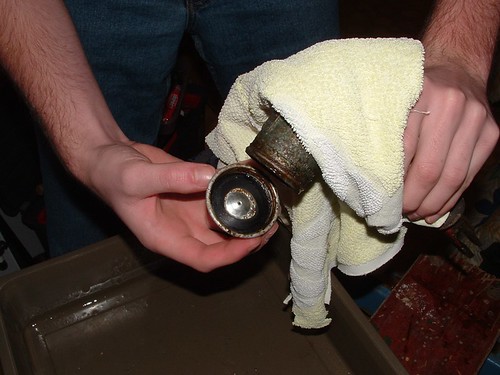
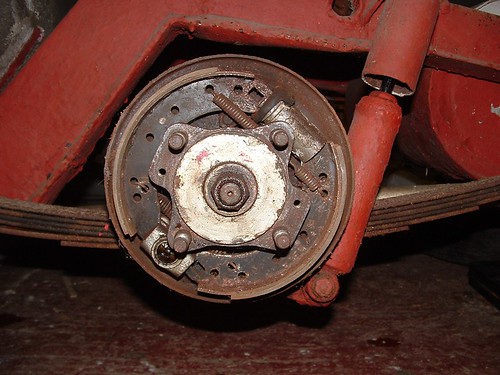
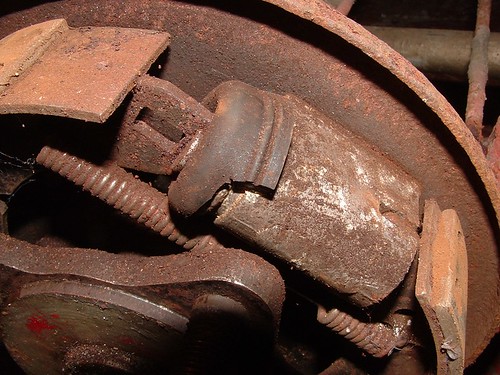
Once the wheels were off the brake drums could be clearly seen. The top cover is easily removed by removing two bolts. The first rear wheel tackled came apart easily. Inside all was clean and free of corrosion, suggesting that no leak had been occurring from there. The opposite side proved more problematic. As we attempted to remove the drum cover, oil began to ooze from the base. When the cover finally came free all became clear. The inside of the drum was coated with oil. It looks as though the brake cylinder inside had sprung a leak at some time but had been patched up. Over time this patch has failed leading to the brake fluid leaking out. The result is that a new cylinder is needed as are a set of brake pads. The ones currently installed are to coated in oil to save.

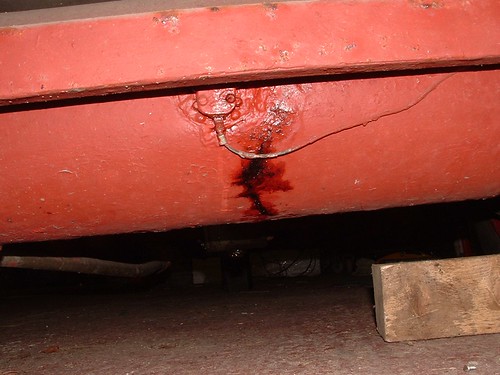
The front brake drum also proved clear though whilst removing it another problem came to light. The bridge pipe appeared to have been snapped at some point, probably during one of its many moves across fields. Here for the first time since starting work on the car we actually found some brake fluid in a bend in the pipe. Unfortunately this ended up in my eye. At least another definitive leak source had been identified as the rest of the pipe work on the car was in perfect condition.

reliant 5.2 reliant 5.1

The next task is to get several new parts and get back to Reg to fit them. This is likely to happen at the start of the summer holidays as at present I have too much work on to fit another visit in. The shopping list currently stands as:

* 22" brake pipe from master cylinder
* 12" bridge pipe for front wheel
* 2 sets of rear brake pads
* 1 rear wheel cylinder

Sunday, 1 January 2006

Master Brake Cylinder Disassembly

Over the Christmas holiday I decided that it was finally time to have a look at the master brake cylinder off Reg seeing as it has been rolling about the boot of the Focus since my last visit. For those of you that have been following the problem was that the lid had sealed itself on, necessitating its removal as testing was impossible with it in situ. I had been doing a bit of research on the internet and have found several places that offer new or reconditioned brake parts for classic cars including Reg's master cylinder. I would like to leave this as a last resort though, as I'd feel much happier actually reusing as many of the old parts as is realistically possible. To this end I liberally soaked the lid in releasing fluid and left it to work its way into the joint for a couple of hours. Needless to say with a bit of force it came straight off. If only I had tried that whilst it had been on the car.....

On closer inspection the seal within the lid was in perfect condition, looking like it had been replaced fairly recently. Based on this and the lack of any evidence of leaks anywhere else on the cylinder I am assuming that the seals inside are in a similar condition. This all points to either the slave cylinder or one of the rear cylinders leaking fluid. I should be going back in a month or so to take the wheels off and have a good check. As for the inside of the cylinder, these all look clean and free from debris.

reliant 4.1 reliant 4.2

The next problem was that the bolt through which the brake pipe exits the cylinder had the remains of the pipe well and truly stuck inside it. This is a legacy of our bodged attempt at removal. Well what I thought was a bodged attempt but it turns out that this is a common occurrence on old cars so we hadn't actually broken anything that wasn't going to get broken anyway. Nevertheless the pipe needed to be removed as I can't imagine it being an easy job to find a replacement bolt. I left it to soak for a couple of days in the releasing fluid and with the help of a hammer managed to ease the pipe out (a job made harder by the fact that the pipes dimensions had become distorted due to previous removal attempts).

The next step is to take the cylinder back to Reg (it's currently in my bedroom), and measure up for a new length of brake pipe, as well as the aforementioned checks that need to be done. I have also found a place where I can get my hands on a flairing tool to flair the end of the pipe so fitting shouldn't be a problem. The Easter target for a working brake system is still looking achievable.

Monday, 1 August 2005

First Tentative Steps

It had been almost a year since my last visit to Reg, and I was eager to get in there and start restoring. I knew it wasn't going to be as easy as that but I am always up for a challenge. Fortunately for me, in the preceding months Reg had been moved from his home in the shed come stable to a nice large and dry garage which was certainly going to make things easier and considerably more pleasant. The approach I have decided to take with the car is to get it basically in running order, instead of going straight in with a full ground up rebuild as I think that at the moment this is beyond my skill level. Hopefully getting it roadworthy again will teach me the basics to allow me to ultimately do the full job that I am planning.

At present I'm not even sure if the engine runs, but that sounds scary looking at that so I instead decided to look at the brakes which haven't worked for the last three years. On initial inspection the pedal was hard down on the floor. Fearing the worst and that they had seized, I gave it a pull and to my pleasant surprise the pedal came up easily. This meant that the most likely culprit was a lack of brake fluid, though where it had gone was a problem that needed attention. First things first was to track down a suitable brake fluid from the local Halfords. My Haynes manual says to use Castrol Girling Universal brake and clutch fluid so in I went to find that it wasn't made any more. The helpful assistant asked me what car I needed to which I replied. He looked surprised to say the least! Never the less he made a few phone calls and I was presented with a bottle which "should do the job". We shall see. I also picked up a brake bleeding kit which basically consists of a piece of tubing and a valve. These obviously weren't in existence in the 60's as the manual describes a much more complicated method involving tubes and jam jars and a seemingly impossible task for a person on their own to complete. I'm glad times have progressed.

Back at the car and the first job was to find the master brake cylinder and check the fluid levels. Easier said than done. For some reason the lid pokes through a hole cut into the drivers footwell floor (which was made of wood to my surprise. See left.). The clearance here is very tight with only about a centimeter around the lid perimeter to get your fingers into. After much struggling it was clear that the lid wasn't going to come off by hand, so out came the WD40 and a monkey wrench. All that I managed to succeed in doing was pulling off the outer alloy coating of the lid. It was not going to budge. On the "wisdom" of my dad we decided the only option left was to remove it. Luckily it is located close to the edge of the car so access was going to be relatively easy, but as with anything on a car that has been stored for so long their were going to be a few nuts and bolts that had seized.

After finally finding the correct sized spanners we set about removing the two retaining bolts. They came off relatively easily though we had to use a fair amount of force. The main problem was disconnecting the brake line that leads to the slave cylinder. We didn't realise till too late that as we were unscrewing the connection, it was actually also twisting the brake line to the point at which it snapped off (being made of copper). That's another thing that now needs replacing. Still the main unit was free and all that was left was to remove the return spring connected to the brake pedal and the job was done. In terms of actual work that could be achieved this was about our limit due to time constraints.

Whilst we were there however I managed to locate several spare parts as shown in the picture, and a spare door, engine and chassis. You never know, they may come in handy in the future. As I was leaving however I happened to notice what appears to be a leak coming from the petrol tank. Good job I found a spare one of those as well.

reliant 3.1 reliant 3.2

Friday, 1 October 2004

Going Into Storage

10/2004: A year on from the original move into storage and I now find myself as the official owner of Reg. I've always loved this car but the circumstances in which I came by it I would never have wished for.

Its amazing how much a car can deteriorate in a year. Its hard to judge the condition of the paint work under a thick layer of dirt, but in a few areas pealing is clearly visible. This means a full respray will be on the cards when the time comes. A few suspicious hoof prints on the bonnet also give some indication that the inhabitants of Reg's shed clearly have no respect for a classic. They're goats in case you are wondering. We decided that one job to do before we left was to erect some sort of barrier to keep the animals off Reg. I wasn't too worried about the paintwork, more about the windscreen. Spares are very hard to find for a vehicle of this age.

reliant 2.1 reliant 2.2

The first thing I checked was the condition of the chassis. Thankfully this looked in good condition, with no visible corrosion. Being stored in a dry but well ventilated space has clearly had its advantages. As for the bodywork there were no problems of corrosion there. The joys of fiberglass. One area of concern though is the trim work. This has corroded and pitted quite badly, as have the hubcaps. I'm going to have to look into getting these restored by someone or possibly look into getting some replacements. Anybody got any parts lieing around?

The main reason for the visit was to jack the car up off its wheels to save damage to the suspension, and also to check that the engine was still well oiled to prevent it from seizing up. The first problem was that the car had rolled back very close to the rear wall. We tried to push the car away but had no success. I originally put this down to trying to push uphill, and the tires having flat spotted. It wasn't till the drive home that I had a flash of inspiration. We probably should have taken it out of gear!

No matter. We soldiered on. Next we got the jack out, unwrapped it and began to jack the car up. Its true that I had never jacked up a car before but my dad assured me he knew what he was doing. Anyway, I got the Haynes manual out, picked up off ebay a few weeks before, and set about locating the jacking points. No information. I really must be starting the learning curve from the very bottom. We chose a couple of likely looking places and jacked Reg up, lowering the chassis down onto several blocks of wood to keep the wheels off the ground. The goats were very intrigued by all this activity and decided to investigate. One minute I was looking under the car, jacking it up, the next I was faced by a goats head. It had crawled underneath the car! I bet that's one thing that not many people can claim to having to deal with while jacking up a car.

Eventually the task was completed, and it was time to build a separating wall. First we had to get a goat off the bonnet, again, then we nailed up some meshing which proved highly successful.

Its now approaching one year since this was written, and I'm preparing to transport Reg back from Wales to nearer my home so that the restoration process can start properly. The next update will tell the story of the move. I'm off to find a trailer, but check back soon.

Wednesday, 1 October 2003

Reliant Regal Restoration: The Beginning

Where best to start off then with the biggest car related project I have undertaken, the complete ground up restoration of a 1961 Reliant Regal. What about some history?

My Reliant Regal (or Reg as we like to call it), started life on the 22nd February, 1961. It originally carried the registration 824 AJW, although this has unfortunately been transferred to another vehicle at some point in the past. The engine is a 598 cc side valve unit, the last production car to be fitted with such a set-up, and has covered about 20,000 miles from new. I believe the original colour was a dark blue, but it now carries a rather fetching shade of signal box red. Believe it or not I am only the third registered keeper, which for a vehicle of this age is very impressive. The previous owner since 1997 was a very good family friend of mine called Len. Len tragically lost his life in 2004, leaving me to inherit Reg. Previous to that Reg had belonged to Len's uncle, so its been in the same family for a very long time.

The story goes that Len's Uncle used to use the car as an every day run around until his wife became fed up with it and ordered him to go and get a replacement. Being a resourceful sort of chap, he just went out and had it repainted. Apparently it fooled her and she thought they had a brand new car! Eventually though the car did fall out of fashion, and for many years remained stored until it came into Len's possession. I have had dealings with the car from this time on, watching as Len restored it back to its former glory, and going for rides along the local roads. Trust me you will never forget watching a full grown man attempting to squeeze into the back seats. Its a bit tight to say the least!The engine had a full rebuild as has the gearbox. I'm hoping not to have to do this again myself.

Around 2000 the car was laid up again as other restoration projects came to the fore. I helped build several protective canopies, one of which ended up blowing away in the wind. Ahem. Anyways, that's pretty much where we find ourselves now.

The year is 2003, the month is October, and surprisingly considering we find ourselves in Wales, its very nice weather. By now Reg had been standing on the same spot for a good couple of years. First task was to check the breaks. Yep, there aren't any. Luckily seized off which I suppose is considerably better than being seized on. This did however pose a problem. The new resting place was going to be in a shed on a neighboring field to the house. To get there involved climbing up an embankment to cross a river, and then descend the other side. This was going to be interesting. We thought we had better try the engine but this didn't even turn over. Luckily we expected this so had a Land Rover present to provide a tow. Having no towing eye, we tied the rope to the cross member by the front wheel. My dad was going to be doing the "driving", which involved sitting in the car and steering, whilst shouting and gesticulating that he was about to end up in the ditch.

regal1.2 regal1.1

All went well initially. We got Reg up the embankment but on the descent the rope jammed the front axle causing the front wheel to skid. As the Land Rover continued to pull, Reg went into a slide coming to a halt a few inches from the side of his new home. Precision or luck, I'll let you decide. Next we backed the car into the shed, by hand this time, then hit the next problem. Picture the scene, Reg is in a shed about four inches longer than himself, the position he needs to be in is 10 foot to the right. Not the easiest space to move a car into. Next followed a series of movements involving jacking one end of the car up, and pulling it to the right until Reg was in position. All that was left to do was nail on the final section of walling and seal Reg in. One year later I'd be back, and in much different circumstances.